


Cuisinart Coffee Maker – 12 cup – with Hot Water System (068459284570)
$180.35
- Note: 1)Too coarse a grind, too little coffee, or insufficiently tamping the grounds before brewing can all lead to inadequate pressure for a proper brew. 2)It is important to note that the amount of espresso extracted will vary depending on the grind size and amount and reprogramming may be needed when the size and amount are adjusted
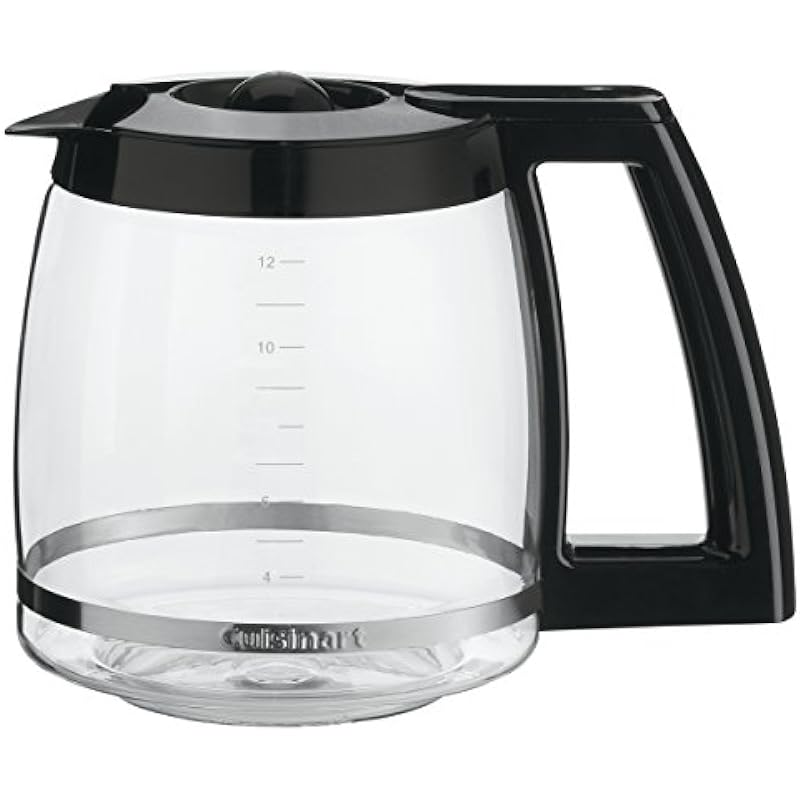
- Has 12 cup carafe with a drip free pour spout and a comfortable handle for easy serving hot water system lets you enjoy instant soups, teas, cocoas and more, and offers convenient indicators that let you know when your hot water is ready and when it’s time to refill
- Fully automatic with 24 hour programmability, self clean function, auto shutoff, and 1 to 4 cup setting bpa free. Safety Feature prevents hot water from being dispensed
- Description
- Additional information
- Brand
- More Products
Description
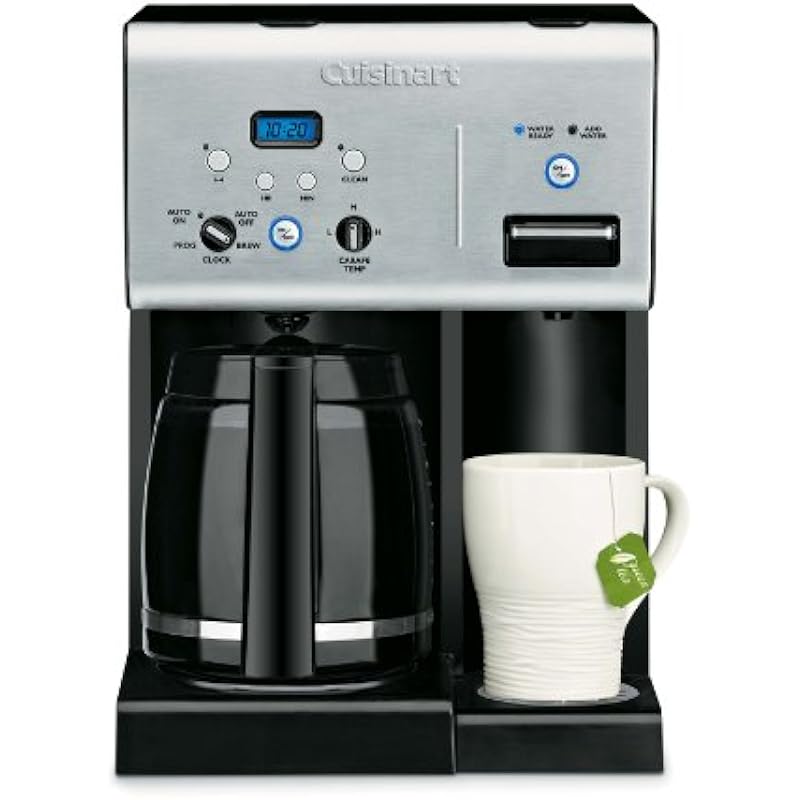
Cuisinart Coffee Maker – 12 cup – with Hot Water System
Cuisinart
- Note: 1)Too coarse a grind, too little coffee, or insufficiently tamping the grounds before brewing can all lead to inadequate pressure for a proper brew. 2)It is important to note that the amount of espresso extracted will vary depending on the grind size and amount and reprogramming may be needed when the size and amount are adjusted
- Has 12 cup carafe with a drip free pour spout and a comfortable handle for easy serving hot water system lets you enjoy instant soups, teas, cocoas and more, and offers convenient indicators that let you know when your hot water is ready and when it’s time to refill
- Fully automatic with 24 hour programmability, self clean function, auto shutoff, and 1 to 4 cup setting bpa free. Safety Feature prevents hot water from being dispensed
- Carafe temperature control offers a heater plate with high, medium and low settings to keep coffee at your preferred temperature programmable blue backlit lcd with digital clock has a brightly lit panel displaying everything at an easy to read glance
- Brew pause feature lets you enjoy a cup of coffee before the brewing cycle has finished removable drip tray leaves you plenty of room for travel mugs charcoal water filter and gold tone filter remove impurities that can alter the taste of your beverages
From the manufacturer


Coffee PLUS 12-Cup Programmable Coffeemaker and Hot Water System
Fresh, delicious coffee is only the beginning!
This incredible hot beverage machine comes complete with all your favourite features, like 24-hour programmability, carafe temperature control, Brew Pause, and the ultra-convenient Hot Water System. Now, you’re never more than a minute away from enjoying your favourite beverage. 12-Cup Carafe with a drip-free pour spout and a comfortable handle for easy serving. A Hot Water System that lets you enjoy instant soups, teas, cocoas and more, and offers convenient indicators that let you know when your hot water is ready and when it’s time to refill. Fully Automatic with 24-hour programmability, self-clean function, auto shutoff, and 1- 4 cup setting. Carafe Temperature Control offers a heater plate with High, Medium and Low settings to keep coffee at your preferred temperature.
Features:
- Programmable LCD with digital clock
- Brew Pause feature
- Removable Drip Tray
- Charcoal Water Filter
- Gold Tone Filter
- Dimension 10.25″ X 9.50″ X 14.30″
- Limited 3-Year Warranty
INSTRUCTIONS
|
|
|
|
|---|---|---|
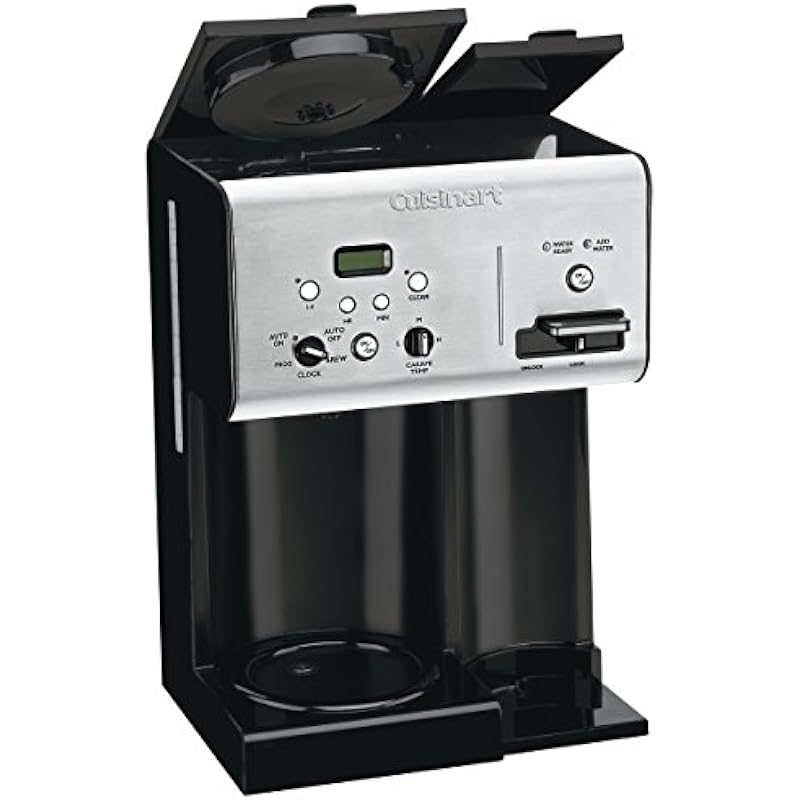
Enjoy The 2-In-1 Coffee PlusYour Coffee Plus system is designed to let you use the Coffeemaker and Hot Water System separately, or at the same time. Perfect for every occasion. Before First Use: We recommend flushing out both the Coffeemaker and Hot Water system before first use. Coffeemaker: Fill the reservoir with cold water and follow the directions for Brewing Coffee. Do Not Add Coffee! Hot Water System: Fill the reservoir to the Max fill line and follow directions for using the Hot Water System. Once the system flush is complete, your Coffee PLUS system is ready to brew and heat water so you can enjoy Cuisinart at its best! Coffeemaker Features and Benifits: 1. Coffeemaker Reservoir Cover Flips back for easy filling. 2. Coffeemaker Water Reservoir (not shown) with water level indicator window. 3. Showerhead (not shown) Distributes water evenly over coffee, reducing temperature loss as water passes through grounds. 4. Charcoal Water Filter Holder Holds filter firmly in place. 5. Charcoal Water Filter (not shown) Eliminates chlorine, calcium and bad tastes and odours from tap water. 6. Filter Basket (not shown) Holds a #4 paper filter or a permanent filter. 7. Filter Basket Holder (not shown) 8. Coffeemaker Control Panel. See detailed illustration, next column. 9. Cord Storage (not shown 10. Brew Pause Feature This feature interrupts the flow of coffee from the basket to let you pour that first cup mid-brew. Because the flavour profile of coffee brewed at the start of a cycle differs from that brewed towards the end, be aware that using this feature will weaken the flavour strength of the finished pot. 11. Carafe The easy-pour, no-drip 12-cup carafe has an ergonomic handle and brewed coffee markings. 12. Adjustable Heater Plate Keeps brewed coffee at desired temperature. Scratch-resistant with nonstick coating. 13. Ready Tone (not shown) Signals the end of the brew cycle with five beeps. 14. Power Loss Back-up System (not shown) One-minute protection if a breaker trips, unit is unplugged, or power fails. Holds all programmed information, including time of day, Auto On time and Auto Off time. Hot Water System Features And Benefits: 15. Hot Water Reservoir Cover Flips back for easy filling. 16. Hot Water Charcoal Water Filter Holder Holds filter firmly in place. 17. Charcoal Water Filter Eliminates chlorine, calcium and bad tastes and odors from tap water 18. Hot Water Reservoir (not shown) With Max fill line 19. Dispensing Lever For dispensing hot water. 20. Safety Lock Prevents hot water from being dispensed when in the locked position. 21. Drip Tray Removable tray with grate. 22. Hot Water Release Tab (not shown) Located underneath the unit. |
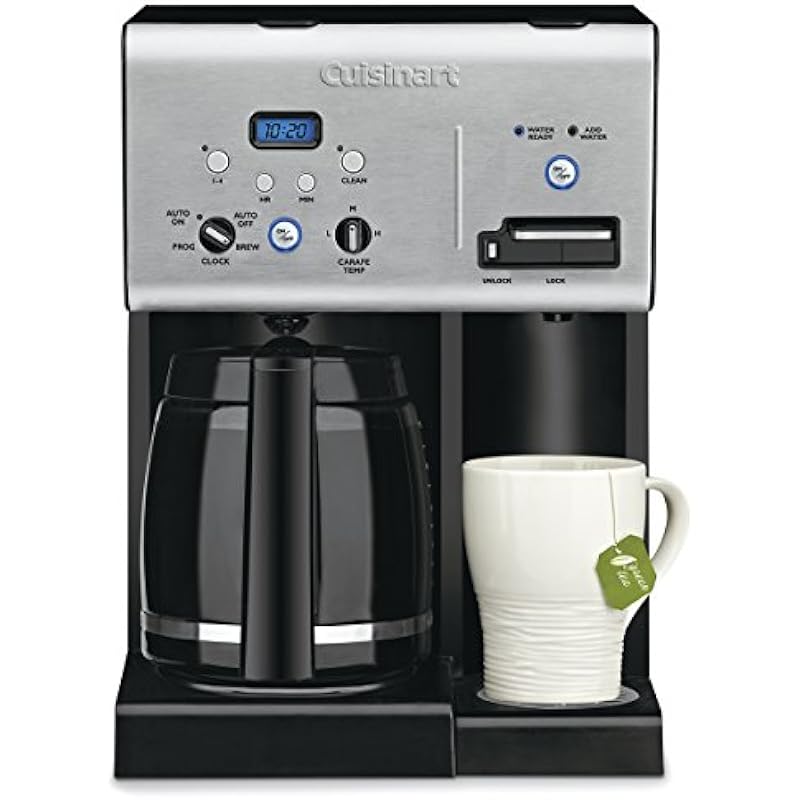
Getting To Know Your Control PanelCoffeemaker Controls: 1. On/Off Button Use to turn your Coffeemaker on and off. Works in tandem with the Function knob. 2. Clock Display Displays time of day, Auto On, and Auto Off times. 3. Hour and Minute Buttons Use to set hours and minutes for time of day, Auto On, and Auto Off times. 4. 1-4 Cup Setting with Indicator Improves extraction, flavour and temperature when brewing fewer than 5 cups. 5. Clean Function Indicates time to clean coffeemaker to remove calcium buildup. 6. Carafe Temperature Knob Set the heater plate to Low (L), Medium (M), or High (H) to keep coffee in the carafe at the temperature you prefer. 7. Function Knob a. Prog Select to program Auto On time. Coffeemaker can be programmed to automatically start brewing up to 24 hours in advance. b. Auto On Select to automatically start brewing coffee at the time you’ve programmed. c. Auto Off Select to program your coffeemaker to automatically shut off up to 4 hours after brewing. d. Brew Select to begin brew cycle when On button is pressed. e. Clock Select to program time of day. Hot Water System Controls: 8. On/Off Button Use to turn your Hot Water System on and off. 9. Water Ready Indicator Indicates when water is heated. 10. Add Water Indicator Indicates when water should be added. 11. Safety Feature (Shown in the locked position) Programming Your Coffeemaker Setting The Clock: When the coffeemaker is plugged in, 12:00 will appear. Turn the Function Knob to Clock: Hold down the Hour or Minute button until the clock begins flashing. Press either button to select the desired time. Hold buttons down to scroll through the digits, or press and release to advance one digit at a time. When scrolling, the numbers will advance slowly and then speed up. When the number displayed approaches the desired time, press and release to advance one digit at a time. Be sure the PM indicator is on if a PM time is desired. To finish setting the clock, turn the Function knob to any other setting or simply wait until the numbers stop blinking. Setting The Auto On Time: When you turn the Function knob to PROG, it displays a previously selected Auto On time, or the default time (12:00pm). 1. Turn the Function knob to Prog Use the Hour and Minute buttons as above, to program your start-brew time. 2. Turn the Function knob to Auto On LCD will display the current time. 3. Press and release On/Off button A blue light indicates that the coffeemaker is in Auto On mode. The blue light around On/Off will come on when brew cycle begins. Both lights will turn off when the Keep Warm cycle ends. Note: To start brew time at the same time the next day, simply make sure the Function Knob is on Auto On and press and release On/Off button once more. The blue Auto On light will turn on. Setting The Auto Off Time: Turn the Function Knob to Auto Off Use the Hour and Minute buttons as above to program your coffeemaker to shut off from 0 to 4 hours after brew cycle is finished. |
Brewing CoffeeFollow instructions in “Before First Use” at the beginning of instructions. 1. Insert charcoal water filter Follow directions for the preparation and insertion of the filter (see above illustration). 2. Fill the water reservoir Open the coffeemaker reservoir cover by lifting it up. Pour in the desired amount of water using the water level indicator located at the side of the coffeemaker. 3. Set preferences a. Push the 1-4 cup button if you are brewing fewer than 5 cups. b. Turn the Carafe Temperature dial to low (L), medium (M), or high (H) and heater plate will keep coffee at the temperature you select. 4. Add the ground coffee Remove the filter basket by grasping the handle and lifting straight up. Insert a #4 paper filter or permanent filter. Be sure that a paper filter is completely open and fully inserted in the basket. It may help to fold and flatten the seams of a paper filter beforehand. Add 1 level scoop of ground coffee per cup. Adjust the amount according to taste. Note: The maximum capacity for ground coffee is 15 tablespoons (225 ml) for this coffeemaker. Exceeding this amount may cause overflow if the coffee is too finely ground. Replace the filter basket in the filter basket holder and press firmly on cover to be sure it closes securely. 5. Before brewing coffee Make sure the glass carafe is in position on the heating plate and the top cover is closed. Plug the cord into an electrical outlet. 6. Power unit Turn the Function knob to Brew, press the On/Off button, and the blue indicator light will turn on. Or, set the Auto On function and the Auto On indicator will light. 7. After brewing When the brewing cycle has been completed, five beeps will sound. Coffee will continue to stream from the filter for several seconds. Note: Reservoir cover may be hot during and directly after brewing. Wait at least 10 minutes before opening. Using The Hot Water System: Follow instructions in “Before First Use” at the beginning of instructions. 1. Insert charcoal water filter Follow directions for the preparation and insertion of the filter. 2. Fill the water reservoir Open the Hot Water reservoir cover by lifting it up. Fill the reservoir with water, making sure not to fill above the Max fill line. 3. Heating Press the On/Off button on the Hot Water side of your unit. The blue On indicator around the On/Off button will light. The Water Ready indicator will flash while the unit is heating. Once the unit has heated, the Water Ready indicator will become solid. 4. Dispensing Water To dispense water, be sure the safety switch, which is located below the lever, is in the unlocked position. Simply slide the safety switch to the left to unlock. Then place a cup on the drip tray and press the lever down – the unit dispenses up to 13 ounces of hot water at a time. If desired, return the safety lock to the locked position (to the right) after dispensing water. Note: You can remove the drip tray to accommodate tall mugs. 5. After dispensing The heater will immediately begin heating more water. The Water Ready indicator will again flash until water reaches serving temperature. Note: The red Add Water indicator will light if more water is needed. 6. Turning off Hot Water System To turn off your Hot Water maker at any time, press the On/Off button. The On indicator will turn off, but the Water Ready indicator will remain lit until water has cooled below serving temperature. For more information, please contact our Customer Service Centre. |


Details
Additional Information
B003WEAHUE
4.4 out of 5 stars
Sellers Rank
#116,048 in Home ()
#314 in
Date First Available
July 15 2010
Manufacturer
Cuisinart
Place of Business
WOODBRIDGE, ON, L4H 0L2 CA
Please to provide feedback.
Additional information
Weight
0.28 kg
Dimensions
5.63 × 4.04 × 3.74 cm
Dimension LXWXH
5.63 X 4.04 X 3.74 cm
Condition
NEW
UPC
068459284570
Model Number
CHW-12C
Manufacturer
Cuisinart
Brand
Cuisinart
-
-
-
-
-
-
Related products
-
-
-
-
-
Additional Information
| B003WEAHUE | |
|
4.4 out of 5 stars |
|
| Sellers Rank | #116,048 in Home () #314 in |
| Date First Available | July 15 2010 |
| Manufacturer | Cuisinart |
| Place of Business | WOODBRIDGE, ON, L4H 0L2 CA |
Additional information
| Weight | 0.28 kg |
|---|---|
| Dimensions | 5.63 × 4.04 × 3.74 cm |
| Dimension LXWXH | 5.63 X 4.04 X 3.74 cm |
| Condition | NEW |
| UPC | 068459284570 |
| Model Number | CHW-12C |
| Manufacturer | Cuisinart |
